In order to make a purchase, customers want to be sure that they know what they are buying. Product photography that illustrates all facets of your product helps shoppers make confident, informed purchases. In fact, buyer research suggests that item photos are the single most important factor in a purchasing decision.
Here are some of the things a great product photo can accomplish:
- It grabs the attention of shoppers and compels them to click—and to buy.
- It displays the product clearly.
- It communicates important information about size, color, and materials.
- It captures both the purpose and feeling of the product.
- It helps shoppers imagine the product in their lives.
There’s always room to improve product photos, from adding seasonal styling to showcasing variations in color or style to make your listings more shoppable. In this article, you'll find strategies for evaluating your existing product photography, taking new photos, and refining your new images with simple editing tools. The result? High-quality, shopper-friendly listing photos that will help your shop shine. Let’s get started!
Step 1: Take stock of your photo quality
As you review your current listing photos, make a list of what you’d like to improve about how your products are displayed. With the goal of having a variety of cohesive, high-quality images for each listing, think about the questions a buyer might have when viewing your item, and what additional photos can help provide clarification.
You should include shots from multiple angles (front, back, bottom, top, side) in your listing, along with close-up shots of any wear or cosmetic damage. Demonstrate scale with a photo that shows your product side-by-side with other recognizable objects. And you can show the fit and cut of wearable items, such as clothing or accessories, by shooting them on a model.
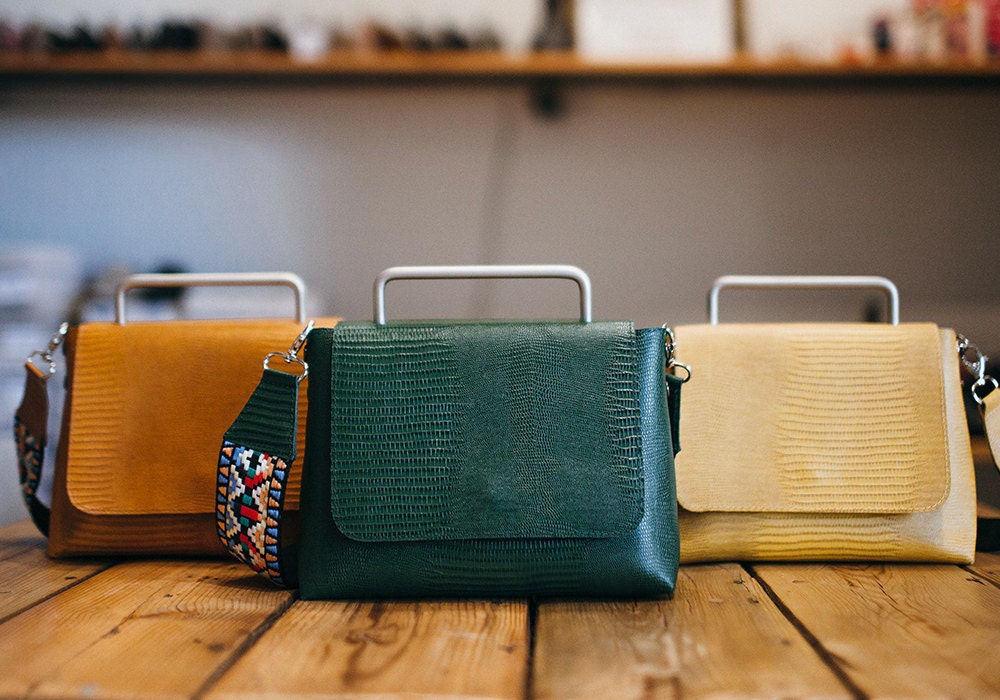
If you sell products that come in different colors, materials, or other variations, it’s essential to provide visual examples of those options for shoppers and connect listing variations to make it easy for customers to shop your options.

Below are a few common factors that can impact the quality of your shop’s photos. Make a note of any areas you’d like to adjust, and check out the Ultimate Guide to Photography for detailed insights.
Lighting: Good lighting is key to good photography. It makes it easier for shoppers to accurately see the details and colors of your products. When lighting your products, the key is to avoid harsh light, whether it’s direct sunlight, a strong fluorescent indoor bulb or a flash on your camera.
Backdrop: Avoid overwhelming shoppers with too many props or busy backdrops, especially when it comes to your primary product image. Your product should be the star of the shot. When in doubt, opt for simplicity and shoot your item by itself in front of a solid, well-lit backdrop.
Clarity: It’s crucial for product photographs to be in focus, because clear product shots give shoppers more confidence to make a purchase.
Size: The recommended size for listing images is 2000px for the shortest side of the image, and a resolution of 72PPI. All images in your shop should be one of these file types: .jpg, .gif or .png. Learn more about file sizes and image types on Etsy here.
Once you’ve made your list of product shots, it can be helpful to get a second opinion on what to prioritize from a friend or fellow shop owner.
Step 2: Plan your shoot
To get great product photos, you need to have a successful photo shoot. But you don’t have to be a professional photographer or have access to a photography studio to make this happen. You can create a product photography set-up at home or take great photos outdoors using the tools and tips in the checklist below. Or, read How to Shoot Your Products for a step-by-step guide.
❏ Gather your equipment: Depending on the kind of shot you want and the setting of your photo shoot, you may need the following:
- Camera or smartphone
- Softbox lights or light box (if shooting indoors)
- Backdrop (seamless paper or a clean wall)
- Tripod (or a sturdy surface like a stack of books, to steady the camera)
- Light reflector (or a piece of white posterboard or a piece of cardboard covered in aluminum foil, used to reflect more light onto your subject)
- Macro lens (for shooting small items and details)
- Shutter release cable or remote control (helpful if you are modeling items yourself)
- Clothespins, clear tape, or clips (to secure your backdrop or items)
- Props (to show use or scale)
❏ Set up your backdrop: Your background should complement your item and keep a shopper’s attention on your product.
- Choose simple, uncluttered backgrounds, such as white or neutral-colored seamless rolls of paper or fabric—or a clean, light-colored wall.
- If you’re using a seamless roll, extend it gently down the wall, laying it over the surface you plan to place your product on.
- Weigh the material down at the bottom, being careful not to crease or wrinkle it.
- Position your product several inches in front of where the background curves.
- If necessary, secure the background with tape or clips.
- Use one or a few consistent backgrounds for all of your products, to create a cohesive look in your online shop.
❏ Light your product: If you want a clear, beautiful shot, lighting your product well is arguably the most important thing you can do.
When shooting indoors:
- Photograph your item near a sunny window, diffusing the light with a sheer curtain.
- If needed, use a reflector to bounce additional light on your subject.
- When shooting without sunlight, use a light box or a set of three softbox lights to eliminate shadows.
- Avoid using your camera’s flash, and avoid mixing natural and artificial lighting, since they have different color tones.
When shooting outdoors:
- Photograph on overcast days.
- Avoid direct sunlight, which can wash out colors and produce harsh shadows.
❏ Steady your camera: Keeping your camera still will help make your photos sharper.
- Use a tripod to steady the camera.
- Use a remote or shutter release cable to take the shot without touching the camera.
- Take a few test photos to make sure that your product is well lit and in focus.
❏ Capture your shot: You’ve put a lot of time into your shoot. Make sure you get all the shots you need.
- Use the rule of thirds to draw the eye to your product. (Imagine the frame of your image as a grid with three vertical and three horizontal lines, and center your image at one of the points where these lines would intersect.)
- When using a smartphone, avoid zooming in on your subject, because this can reduce the quality of the image.
- If you are using props for, say, a lifestyle shot, make sure your product is the star of the photo, and it’s clear what is being sold.
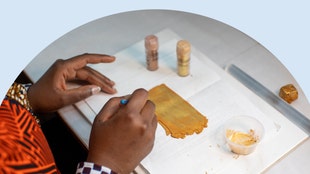
- Use the macro setting or a macro lens for close-ups and to photograph small items like jewelry.
- Take photos of your product from multiple angles.
Step 3: Edit to your advantage
Even the best photographers need a little editing help, and you can give your photos a finishing touch with a few light edits. Making a few simple touch-ups can make your images look polished and professional.
- Crop your photos to remove excess white space and focus customer attention on your product, using the rule of thirds.
- Use editing software like Aviary or Photoshop for quick touch-ups or to adjust brightness so that the colors in the photo reflect how your products look in person. If you're capturing photos on your mobile phone, free apps like Snapseed and Lightroom Mobile allow you to adjust the color and brightness of your images
- Avoid using Instagram-type filters that alter the colors of your product.
As you edit your photos, be careful not to go overboard. Using filters and other photo manipulations can distort the appearance of your product and create a misleading image, which could lead to unhappy customers. While photo editing won’t turn a bad photo into a good photo, it can help make a good photo great. Find more tips for editing your photos here.
Step 4: Update your listings
Now that you’ve done the heavy lifting of photographing and editing your items, it’s time to show them off! Upload your new photos to existing listings in the listings manager. Any photo you’ve uploaded to your listing can be linked with any of your variations. While editing a listing, go to your variations section and click Link photos—then, choose from your existing listing images. If you want to upload a new image of one of your variation options, you’ll need to add that to the listing first and then link it to the variation. You can only link photos that are uploaded to a listing—the maximum number of listing photos you can add is 10.
Review and upload your photos
 Words by Etsy Staff